
ASSIGNMENT - Model a possible final project, and post it on your class page
2D CAD {DESIGN}
I wasn't really sure what I wanted to make or which programmes to use/try out. I have a long history using freehand, illustrator, photoshop, and recently with coreldraw. I decided to start by doing a diagram of my final project concept, just to get ideas flowing...

I finally came up with the idea to maybe look at an organic pattern, either as a decorative ornament underneath, or to engrave on to or through the solid part of the bird feeder.
I found inspiration in the sand dollar, and started drafting a pattern in inkscape from there.

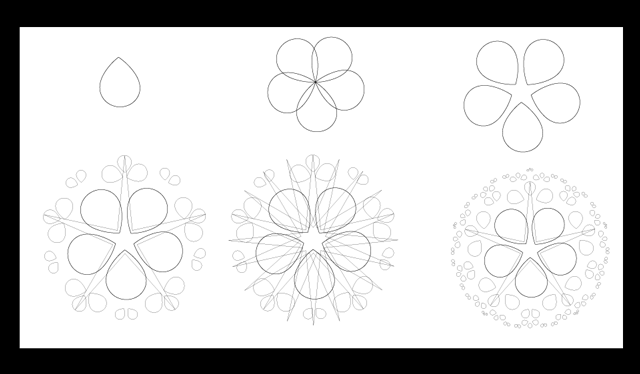
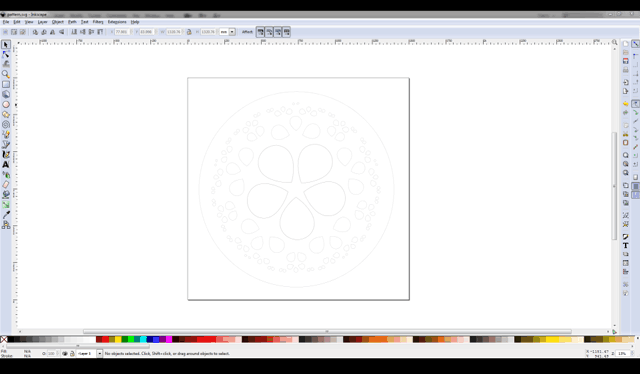
I had a few difficulties as the layout, navigation, shortcuts and tools work quite differently in inkscape compared to the programmes I would normally use, but I got the hang of it and managed to make and export my pattern.
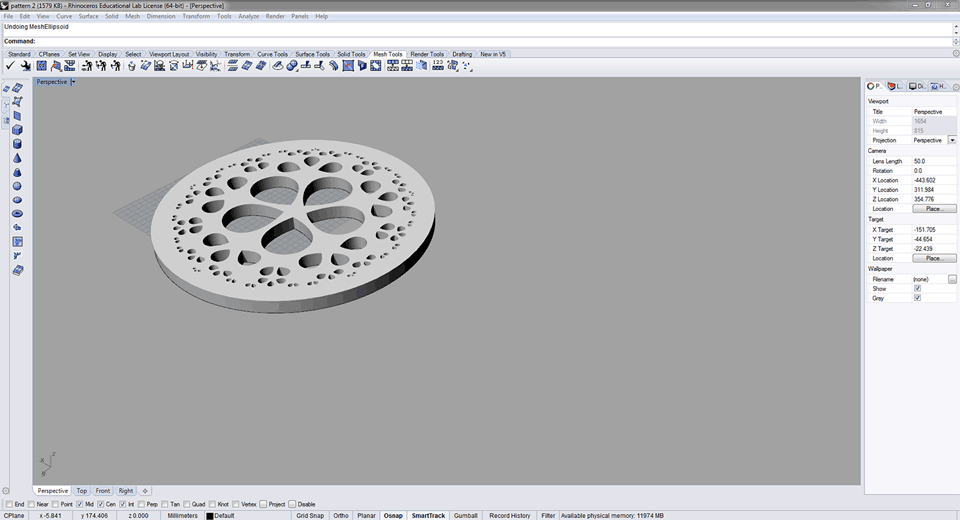
I exported the pattern to rhino instead of fusion 360 because the software was updating, it took a good 4 hours, which I couldn't waste.

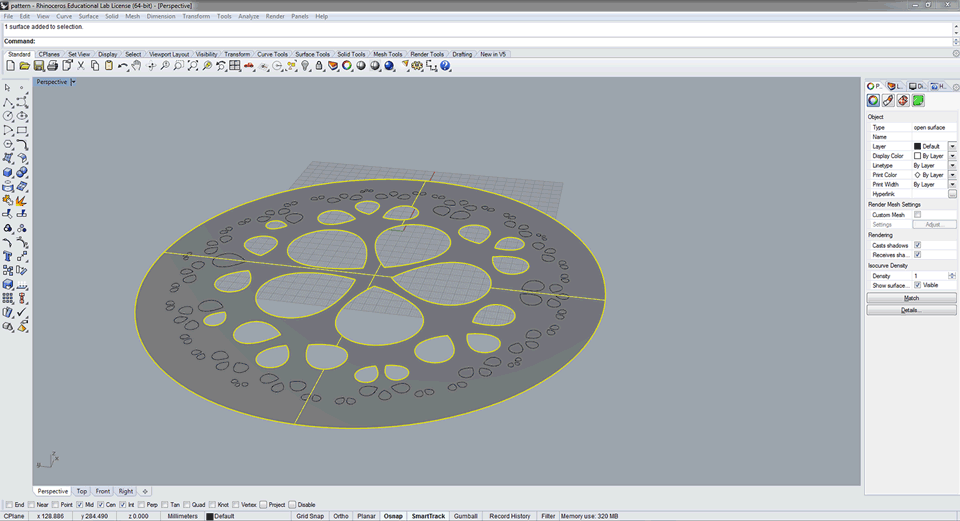
I cut out the shapes form the surface and then trimmed the surface
edges. After that I extruded the shape, to make it 3D.
3D CAD {DESIGN}
I also tried my hand at a few 3D CAD programmes including Tinker CAD and fusion 360, as suggested by Ohad, our guru.
I started out by doing a few tutorials.
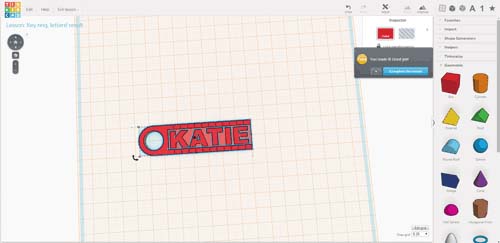
Tinker CAD was easy to understand and use, but it seemed like it would not be able to handle extremely complex models.
I have used 3D Studio max, Maya and Lightroom before, so I do have an understanding of the layout and tools in these programmes and how they work. Fusion 360 is similar but far more intense in that you have all the extra simulation and testing capabilities.
Keyboard shortcuts are most important to me, they save you time!
Here are some of the fusion 360 shortcuts

A little bit about what I learnt about fusion 360.
It is a top-down design methodology, the way I understand that is, you can see, access and change different components. This makes it easier to change things when things have gone wrong, as they often do when working in new applications.
You can also export data which is compatible with other CAD software, which you can't do with some of the others.
The interface and navigation is quite user friendly and the different "modes" you can work in, found in the browser, are easy to get used to.
I really enjoyed learning to work with the organic shapes and joints.
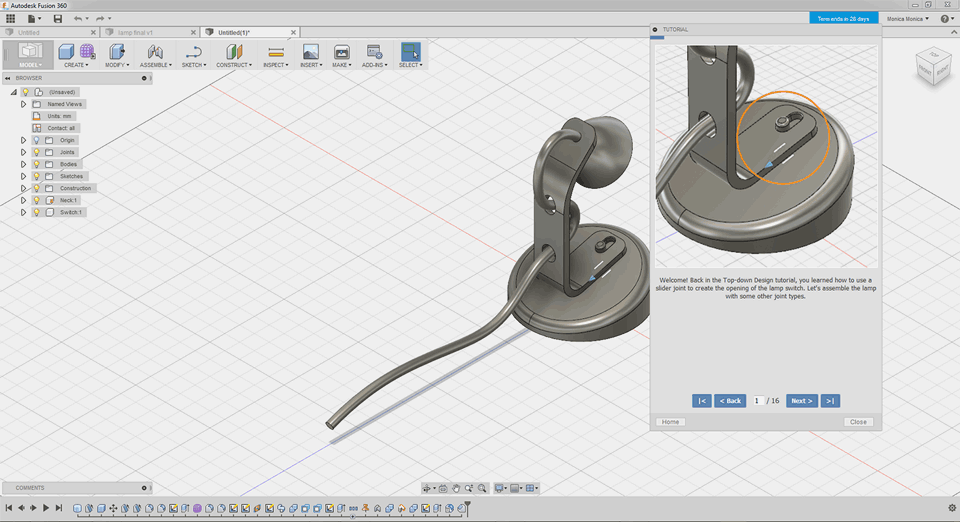
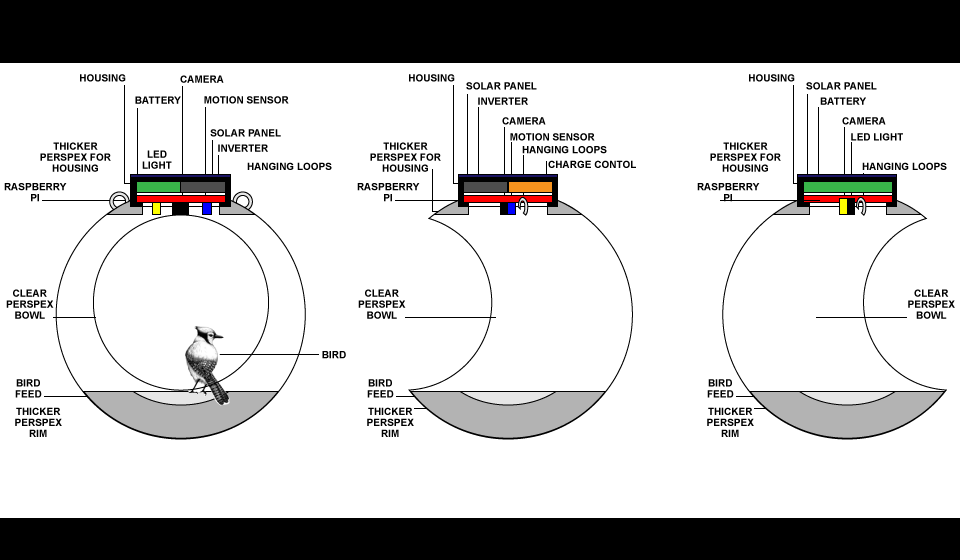
After I finished the some of the tutorials I started modelling the bird feeder I am considering as my final project.
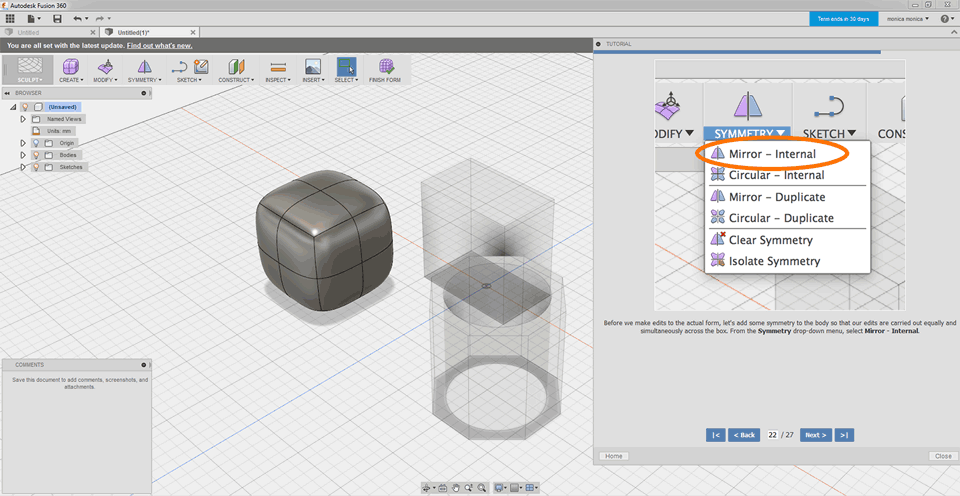
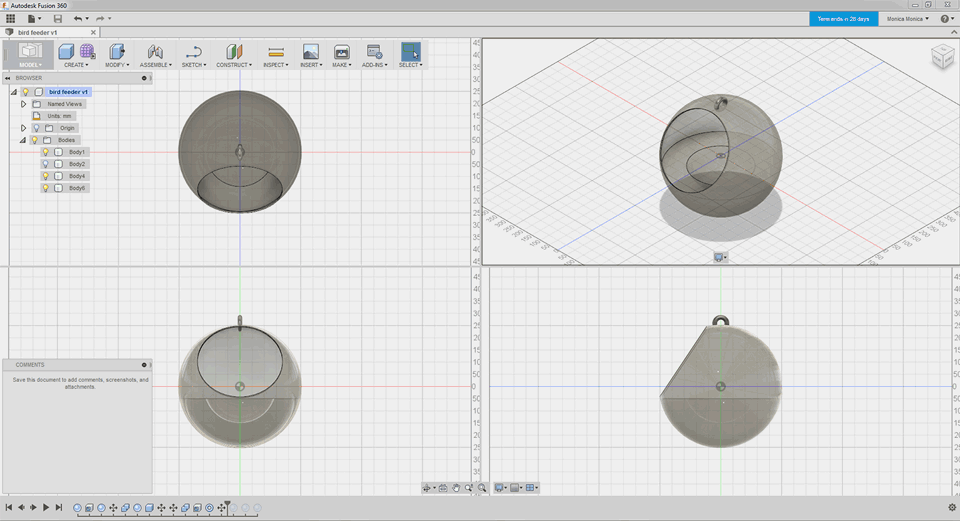
I modelled 2 spheres to start, one big one and a smaller one, I placed the smaller one where the "entrance" to the feeder is and subtracted it from the bigger one, after which I used the shell tool, in the modify panel, to create a thickness on the bowl.
I had duplicated the two spheres to create the inside feeding area, again by subtraction. and placed it inside the bowl.
At first I thought I would have the bowl hang from a loop (which you can see here, created using a torus), but realised that then I would not have the space to add the solar panel and electronics components to the top.
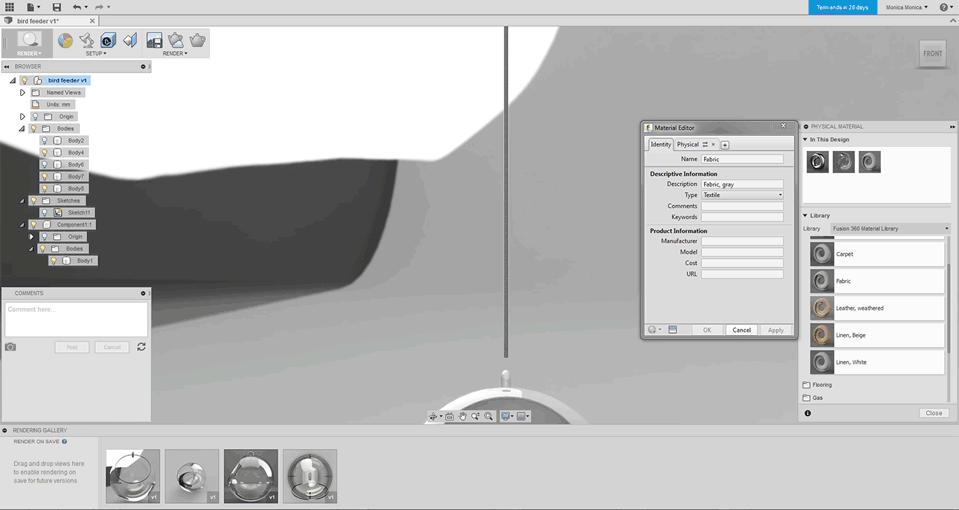
I applied textures and rendered it from the render platform and the appearance in the setup panel , then realised I needed to adjust the hooks/loops/hanging bits. I will admit that I worked this slightly the wrong way round.
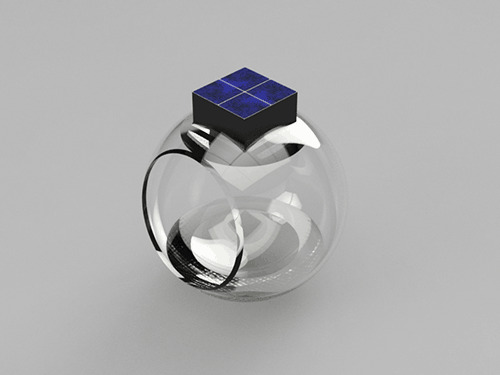
So after then doing the 2D CAD I reworked the look of the feeder again. Adding the components to the top of the feeder. Added maps, by clicking on the insert panel and selecting decals , and rendered it again.
I am still working on what the best way would be to hang or stand the feeder will be.
Fusion 360 saves my files to a cloud, so I don't have all my files and had to download the latest file to my design files.
Next I did the animation, break apart and rotation. from the animation platform and the auto explode function in the transform panel.
The animation will not work unless you convert object bodies to components. Once I converted my bodies in the modelling platform to components I
seem to loose the decal map I added for the solar panel.
I am still working on getting that to remain in place when animating.
I tried to copy my inkscape/carel draw/rhino file, of the sand dollar, into the fusion file, saved it as fusion readable, tried to copy again, tried uploading and importing to no avail. If anyone has a solution for how I can load the design into the birdfeeder file I would appreciate the advice.
Besides all the problems I have faced with Fusion 360 in terms of the saving of files to cloud and how to save to my computer (which you cannot do - you have to download it from the cloud), still trying to figure out how to import existing artwork into files, why decals dissappear when animating? and a plethora of other questions, I still find it a strong design tool with many features I never even considered before using the programme. I will continue learning about this tool, especially the simulation part of it.
I finally manged to export a 1mb .avi file which I then converted to an .MP4 which made the animation about 70kb.
I am still trying to learn about the plug ins, the MP4 seems to work in chrome, but not firefox... I tried to make it a GIF file but that made the file 300 odd kb big and it didn't seem to work at all, so I have left it as the MP4 for now.
Download my working files HERE